
Digital photography often feels overly sharp or clinical. Many creators now crave the nostalgic warmth and grainy texture of vintage analog styles. Film look photo editing bridges the gap between modern technology and classic storytelling.
Mastering the craft of digital aesthetics involves balancing colors, shadows, and light. By adjusting specific sliders, photographers mimic the iconic characteristics of classic stocks. This process transforms ordinary snapshots as deeply evocative pieces of art.
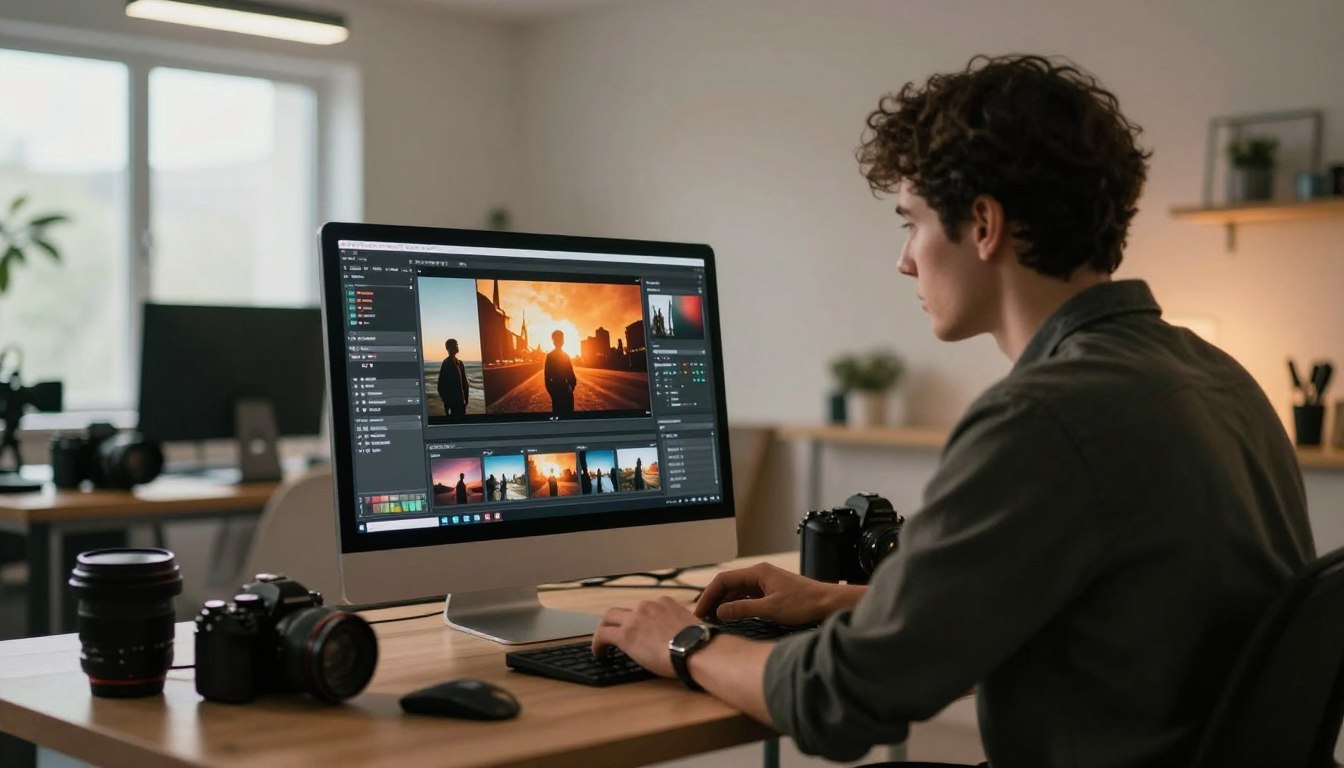
If you desire efficiency, professional tools are available. Utilizing high-quality assets from the site Lpresets.com makes the process faster and more consistent. This resource helps you capture that elusive cinematic mood with minimal effort.
This path for visual excellence begins with subtle adjustments. Giving your images a professional edge requires practice and the right guidance. Your creative vision deserves the best possible resources for success.
Understanding these advanced editing techniques ensures your portfolio stands out clearly in a crowded digital space.
Key Takeaways
- Understand the core elements of cinematic styles.
- Learn the importance of color grading for mood.
- Discover ways software simplifies complex edits.
- Use presets from Lpresets.com for faster results.
- Balance grain and sharpness for a realistic feel.
- Enhance storytelling through visual nostalgia.
1. Understanding the Cinematic Film Aesthetic
The allure of cinematic film aesthetics lies in its ability to imbue digital photographs with a timeless, nostalgic quality. This aesthetic has captivated photographers and audiences alike, prompting a deeper exploration into its defining characteristics.
What Defines a Film Look in Photography
The film look in photography is characterized by a distinct set of visual elements that differentiate it from digital photography. These elements include a unique color palette, contrast, texture, and grain.
Key Visual Characteristics of Cinematic Images
Cinematic images are known for their captivating visual appeal, which can be broken down into several key characteristics.
Color Palette and Tone
The color palette and tone of cinematic images often evoke a specific mood or atmosphere. Warm tones may create a cozy, nostalgic feel, while cool tones can convey a sense of detachment or futurism.
As noted by a renowned photographer, “The right color palette can transform an image, giving it a life and feel that resonates with the viewer.”
“Color is a power which directly influences the soul.”
Contrast and Dynamic Range
Contrast and dynamic range play crucial roles in defining the cinematic look. A balanced contrast enhances the visual depth of an image, while an appropriate dynamic range ensures that both shadows and highlights are preserved.
| Characteristic | Description | Effect on Image |
|---|---|---|
| Contrast | Difference between light and dark areas | Enhances visual depth |
| Dynamic Range | Range of tones from shadows to highlights | Preserves detail in both shadows and highlights |
Texture and Grain
Texture and grain add a layer of authenticity to cinematic images. Film grain, in particular, is a characteristic that many photographers seek to emulate in their digital work.
Why Photographers Choose Film Emulation
Photographers choose film emulation for its unique aesthetic qualities and the emotional response it elicits. Film emulation presets, available on platforms like Lpresets.com, offer a convenient way to achieve this look.
By understanding and applying these characteristics, photographers can create images that not only capture the essence of cinematic film aesthetics but also evoke a profound emotional response from their audience.
2. Essential Lightroom Tools for Film Emulation
Achieving a cinematic look in Lightroom requires a deep understanding of the essential tools that facilitate film emulation. Lightroom offers a comprehensive suite of tools designed to help photographers transform their digital images into cinematic masterpieces.
The Tone Curve Panel Explained
The Tone Curve Panel is a powerful tool in Lightroom that allows for precise control over the tonal range of an image. By adjusting the tone curve, photographers can create a more cinematic look by enhancing contrast and adjusting exposure.
Key adjustments to make in the Tone Curve Panel include:
- Creating an S-curve to enhance contrast
- Adjusting the shadows and highlights to achieve a more balanced exposure
- Using the point curve to make targeted adjustments
HSL and Color Grading Capabilities
Lightroom’s HSL (Hue, Saturation, Luminance) panel and Color Grading tools are essential for achieving the nuanced color palettes characteristic of film. The HSL panel allows for precise control over individual colors, while the Color Grading panel enables broader, more creative color adjustments.
Using these tools effectively involves:
- Adjusting hue, saturation, and luminance to refine specific colors
- Applying color grading to create a cohesive look across the image
Effects Panel for Film Grain and Vignetting
The Effects Panel in Lightroom is where photographers can add film grain and vignetting to their images, two key elements that contribute to a cinematic aesthetic. Film grain adds texture and character, while vignetting can draw the viewer’s attention to the subject.
- Balancing grain amount with image resolution
- Adjusting vignette settings to enhance the image without distracting from the subject
Camera Calibration for Authentic Color Shifts
Camera Calibration in Lightroom allows photographers to achieve authentic color shifts reminiscent of different film stocks. By adjusting the calibration settings, photographers can impart a unique color character to their images.
Effective use of Camera Calibration involves:
- Understanding how different calibration settings affect the image
- Experimenting with various profiles to find the desired look
3. Preparing Your Images for Film Treatment
The key to a successful film look photo editing process lies in the preparation stage. Proper preparation ensures that your images are optimized for the film treatment, resulting in a more authentic and visually appealing cinematic aesthetic.
Selecting Photos That Work Best with Film Looks
Not all images are suitable for a film look. Photos with good contrast, interesting composition, and a clear subject tend to work best. When selecting photos, consider the mood and atmosphere you want to convey. High-contrast images with deep shadows and bright highlights are ideal for creating dramatic film looks.
| Image Characteristics | Ideal for Film Look | Not Ideal for Film Look |
|---|---|---|
| Contrast | High contrast | Low contrast |
| Composition | Interesting composition | Simple or cluttered composition |
| Subject Clarity | Clear subject | Busy or unclear subject |
Setting Proper Exposure and White Balance
Adjusting the exposure and white balance is crucial before applying a film look. Proper exposure ensures that your image has the right amount of detail in both shadows and highlights. White balance correction helps in achieving a natural color palette that can then be creatively altered during the film grading process.
Organizing Your Workflow for Efficiency
An organized workflow is essential for efficient film look photo editing. This includes creating a consistent naming convention for your files, using folders to categorize your images, and utilizing Lightroom’s cataloging features. By streamlining your workflow, you can focus more on the creative aspects of film look editing.
4. How to Get Film Look in Lightroom: Step-by-Step Process
To transform your digital photos into cinematic masterpieces, follow this step-by-step guide on creating a film look in Lightroom. The process involves a series of adjustments that help emulate the classic film aesthetic.
Step 1: Adjusting Basic Panel Settings
The first step in achieving a film look is to adjust the basic panel settings. This involves making subtle changes to the exposure, contrast, and tone of your image.
Reducing Contrast for Film Softness
Film is known for its softer contrast compared to digital images. To achieve this, reduce the contrast in the Basic Panel. This will help create a more cinematic feel.
Adjusting Highlights and Shadows
Adjusting the highlights and shadows is crucial for creating a balanced tone. Drag the Highlights slider to the left to recover blown-out highlights, and adjust the Shadows slider to reveal details in the darker areas.
Modifying Whites and Blacks
Fine-tune the whites and blacks to set the overall tone of your image. Be cautious not to lose detail in the process.
Step 2: Creating the Signature S-Curve
The S-Curve is a hallmark of the film look, characterized by a gentle S-shape on the Tone Curve. This curve enhances the contrast in the mid-tones while maintaining detail in the highlights and shadows.
Lifting the Blacks on the Tone Curve
To create the S-Curve, start by lifting the blacks on the Tone Curve. This helps in adding depth to the image.
Rolling Off the Highlights
Next, roll off the highlights to prevent them from becoming too bright. This step is crucial for maintaining a natural look.
Step 3: Fine-Tuning Clarity and Texture
Finally, fine-tune the clarity and texture to give your image a more film-like quality. Adjusting these settings helps in achieving a softer, more cinematic look.
By following these steps and making adjustments to the basic panel settings, creating the signature S-Curve, and fine-tuning clarity and texture, you can achieve a beautiful film look in Lightroom. This process not only enhances your images but also gives them a unique, cinematic aesthetic.
5. Mastering Color Grading for Cinematic Results
Mastering color grading is crucial for achieving a cinematic look in Lightroom. Color grading is a powerful tool that can transform your images, giving them a unique aesthetic that resonates with viewers. By understanding the principles of film color science and utilizing Lightroom’s Color Grading Panel, you can create visually stunning images that evoke the desired mood and atmosphere.
Understanding Film Color Science
Film color science refers to the unique color characteristics and palettes associated with different film stocks. Each film stock has its own distinct look, influenced by factors such as the type of film, exposure, and development process. To achieve a cinematic look, it’s essential to understand these color characteristics and how to replicate them in Lightroom.
Some key aspects of film color science include:
- Color casts: Different film stocks exhibit unique color casts, such as the warm tones of Kodak Portra or the cool tones of Fujifilm Pro 400H.
- Color grading: The process of adjusting the color of an image to achieve a specific look or mood.
- Color palette: The range of colors used in an image, which can be influenced by the film stock and grading techniques.
Working with the Color Grading Panel
Lightroom’s Color Grading Panel is a powerful tool for achieving cinematic color grades. This panel allows you to adjust the color of your images with precision, using a combination of wheels and sliders to target specific tonal ranges.
Shadows Color Adjustments
Adjusting the shadows is crucial for setting the overall mood of your image. By using the Shadows Color Wheel, you can introduce a specific color cast to the shadows, enhancing the cinematic feel.
Midtones Color Manipulation
The midtones are where the majority of the image detail resides. Adjusting the midtones allows you to fine-tune the overall color balance and create a more natural or stylized look.
Highlights Color Tuning
Highlights are critical for creating a cinematic look, as they can add depth and dimensionality to your image. By adjusting the Highlights Color Wheel, you can achieve a more nuanced and film-like aesthetic.
Creating Teal and Orange Cinematic Looks
One of the most iconic cinematic looks is the teal and orange color grade. This look is characterized by cool shadows and warm highlights, creating a visually striking contrast. To achieve this look in Lightroom, adjust the Color Grading Panel to introduce teal tones in the shadows and orange tones in the highlights.
Achieving Vintage Film Color Palettes
Vintage film color palettes are highly sought after for their unique aesthetic. To achieve a vintage film look, experiment with different color grading techniques, such as introducing subtle color casts and adjusting the overall color balance. Using film emulation presets can also help streamline the process and achieve a consistent look.
By mastering color grading techniques and understanding film color science, you can create images with a cinematic aesthetic that captivates your audience. Whether you’re aiming for a teal and orange look or a vintage film palette, Lightroom’s tools provide the flexibility and precision needed to achieve your creative vision.
6. Adding Authentic Film Grain in Lightroom
To give your digital photos a genuine film aesthetic, mastering the art of adding film grain in Lightroom is essential. Film grain adds texture and character to your images, making them look more organic and less digital. In this section, we’ll explore how to effectively use Lightroom’s film grain settings to enhance your photographs.
Understanding Film Grain Settings and Controls
Lightroom offers a range of controls for adjusting film grain, allowing you to customize the look to suit your image. The Grain section in the Effects panel provides three main controls: Amount, Size, and Roughness.
- Amount: Controls the intensity of the grain. Higher values produce more pronounced grain.
- Size: Adjusts the size of the grain particles. Larger sizes result in a more subtle, film-like texture, while smaller sizes produce a more pronounced, noisy effect.
- Roughness: Affects the uniformity of the grain. Higher roughness values create a more irregular, organic grain pattern.
Understanding these controls is crucial for achieving the desired film look. As Ansel Adams once said, “You don’t take a photograph, you make it.” Mastering grain settings allows you to make a more authentic film-inspired photograph.
“The grain is a fundamental aspect of the film’s texture and aesthetic. It’s what gives film its unique, organic feel.”
Choosing the Right Grain Amount
The amount of grain you add depends on the look you’re trying to achieve and the type of image you’re working with. For a more subtle film look, start with a lower grain amount and adjust to taste.
| Grain Amount | Effect | Best Use |
|---|---|---|
| Low | Subtle texture | Portraits, landscapes |
| Medium | Balanced film look | General photography, street photography |
| High | Prominent grain | High-contrast images, artistic projects |
Adjusting Grain Size for Different Film Stocks
Different film stocks have distinct grain characteristics. Adjusting the grain size in Lightroom can help you emulate the look of specific films. For example, a larger grain size can mimic the look of high-speed film stocks, while a smaller grain size can replicate the finer grain of slower films.

Balancing Grain with Image Resolution
When adding grain, it’s essential to consider the resolution of your image. High-resolution images can handle more grain without becoming overly noisy, while lower resolution images may require more subtle grain additions to avoid looking too textured.
By understanding how to balance grain with image resolution, you can achieve a more authentic film look that enhances your photographs without overpowering them.
7. Working with Lightroom Film Presets
Lightroom film presets have revolutionized the way photographers achieve a cinematic look in their photos. These presets allow for a streamlined editing process, enabling photographers to apply complex film emulations with just a few clicks.
Benefits of Using Film Emulation Presets
Film emulation presets offer several benefits to photographers. They save time by applying a consistent look across multiple images, allowing for a cohesive portfolio or series. Presets also serve as an excellent starting point for further editing, enabling photographers to fine-tune the look to their preference. Moreover, presets can inspire creativity by introducing photographers to new styles and color palettes they may not have considered before.
Discovering Lpresets.com Film Preset Collections
Lpresets.com is a valuable resource for photographers seeking high-quality film presets. The website offers a wide range of preset collections that cater to different tastes and photographic styles.
Professional Film Preset Packs
For photographers looking for a more contemporary and polished look, professional film preset packs are available. These packs are designed to emulate the latest film stocks and are ideal for photographers seeking a modern aesthetic.
Vintage Film Effect Collections
Vintage film effect collections, on the other hand, are perfect for those who wish to add a nostalgic touch to their photos. These presets mimic the characteristics of older film stocks, providing a unique and timeless look.
How to Install and Apply Film Presets
Installing and applying film presets in Lightroom is a straightforward process. First, download the preset package from a reputable source like Lpresets.com. Then, import the presets into Lightroom through the Develop module. Simply click on the preset to apply it to your image.
Customizing Presets for Your Style
While presets provide a great starting point, customizing them allows photographers to tailor the look to their specific style. Adjusting settings such as exposure, contrast, and color grading can help achieve a more personalized aesthetic.
Creating Your Own Lightroom Film Preset Pack
For those who wish to take their editing to the next level, creating a personal preset pack can be a rewarding experience. By saving your custom settings as presets, you can apply your signature style to future projects efficiently.
8. Replicating Classic Film Stocks in Lightroom
The art of replicating classic film stocks in Lightroom involves understanding the unique characteristics of iconic films like Kodak Portra and Fujifilm Pro 400H. By mastering these film emulation techniques, photographers can add a new dimension to their digital images, infusing them with the warmth and authenticity of analog photography.
Achieving the Kodak Portra Look
Kodak Portra is renowned for its smooth, natural skin tones and subtle color rendition. To achieve this look in Lightroom, start by adjusting the Color Grading panel. Focus on creating a natural color palette with a slight emphasis on warm tones.
- Adjust the Shadows color to a warm hue to enhance skin tones.
- Reduce the Clarity and Texture sliders to soften the image.
- Apply a moderate amount of Grain to mimic the film’s texture.
Emulating Fujifilm Pro 400H Aesthetic
Fujifilm Pro 400H is celebrated for its vibrant yet natural colors and excellent skin tones. To emulate this aesthetic in Lightroom, follow these steps:
- Start by setting the White Balance to match the scene’s lighting conditions.
- Use the HSL panel to fine-tune the colors, particularly enhancing the greens and blues.
- Apply a subtle S-Curve in the Tone Curve panel to add depth to the image.
Creating Kodak Ektar Vibrant Colors
Kodak Ektar is known for its vibrant, saturated colors. To recreate this look in Lightroom:
- Increase the Contrast and Clarity to enhance the image’s punch.
- Use the HSL panel to boost the saturation of specific colors, particularly reds and yellows.
- Apply a slight Vignette to draw attention to the center of the image.
Black and White Film Emulation Techniques
Converting images to black and white can add a timeless quality. To emulate classic black and white film stocks in Lightroom:
Use the Black and White panel to adjust the conversion. Pay particular attention to the Mix settings to achieve a balanced tonal range.
| Film Stock | Key Characteristics | Lightroom Adjustments |
|---|---|---|
| Kodak Portra | Smooth skin tones, natural colors | Warm Shadows, reduced Clarity and Texture |
| Fujifilm Pro 400H | Vibrant yet natural colors, excellent skin tones | Accurate White Balance, enhanced Greens and Blues |
| Kodak Ektar | Vibrant, saturated colors | Increased Contrast and Clarity, boosted Reds and Yellows |
By understanding and replicating the characteristics of these classic film stocks, photographers can achieve a range of distinctive looks in Lightroom, from the natural and subtle to the vibrant and bold.
9. Advanced Techniques for Film Look Photo Editing
Discover the secrets to creating stunning film-inspired photographs using advanced Lightroom editing techniques. To take your film look photo editing to the next level, it’s essential to master a range of advanced techniques that can add depth, character, and authenticity to your images.
Creating Halation and Bloom Effects
Halation and bloom effects are characteristic of certain film stocks and can add a dreamy, ethereal quality to your photos. To achieve this look in Lightroom, you can use a combination of the Effects Panel and the Transform tool. Start by applying a generous amount of grain and then adjust the Highlights and Shadows sliders to enhance the blooming effect around bright areas.
- Increase the Grain Amount to create a more pronounced film-like texture.
- Adjust the Highlights slider to control the intensity of the bloom effect.
- Use the Transform tool to subtly adjust the image’s perspective and enhance the overall cinematic feel.

Adding Subtle Light Leaks
Light leaks can add a touch of authenticity to your film look photos by simulating the imperfections of analog film. To add subtle light leaks in Lightroom, you can use the Effects Panel and overlay a texture or create a custom adjustment brush.
To create a light leak effect:
- Use the Adjustment Brush to create a new adjustment pin.
- Adjust the Exposure and Color settings to match the desired light leak effect.
- Paint over the area where you want the light leak to appear, using a low Flow setting for a more subtle effect.
Applying Film-Style Vignetting
Vignetting is a common characteristic of film photography that can add depth and focus attention to your subject. In Lightroom, you can apply film-style vignetting using the Effects Panel. Experiment with different vignette styles and amounts to find the one that best complements your image.
Softening Digital Sharpness for Organic Feel
Digital images can sometimes appear too sharp or sterile compared to film. To soften this sharpness and achieve a more organic feel, you can apply a subtle amount of grain and adjust the Clarity and Sharpness settings.
- Reduce the Clarity to soften mid-tone contrast.
- Adjust the Sharpness to a lower setting to reduce digital crispness.
Using Camera Calibration for Color Shifts
Camera Calibration in Lightroom allows you to create unique color shifts reminiscent of different film stocks. By adjusting the Calibration settings, you can achieve a range of color effects, from subtle to dramatic.
To apply a color shift:
- Navigate to the Calibration panel.
- Adjust the Shadow Tint and Red Primary settings to achieve the desired color cast.
- Experiment with different profiles to find the one that best suits your image.
10. Common Mistakes to Avoid When Creating Film Looks
When striving for a cinematic aesthetic in Lightroom, photographers often encounter pitfalls that can compromise their artistic vision. Achieving a film look is not just about applying the right presets or adjustments; it’s also about avoiding common mistakes that can detract from the desired outcome.
Over-Processing and Losing Natural Character
One of the most significant errors photographers make when trying to achieve a film aesthetic in Lightroom is over-processing their images. This can result in a loss of natural character and an unnatural, overly manipulated look.
To avoid this, it’s essential to strike a balance between making necessary adjustments and preserving the original image’s integrity. Subtlety is key when applying film emulation techniques.
Adding Too Much Film Grain
Film grain can add a beautiful, organic texture to digital images. However, adding too much grain can make the image look noisy and detract from its overall quality.
The key is to find the right balance between adding enough grain to give the image a film-like quality without overpowering the details.
Inconsistent Color Grading Across Photo Series
Maintaining consistency in color grading is crucial, especially when working on a series of photos. Inconsistent color grading can make a collection look disjointed and unprofessional.
| Color Grading Element | Consistency Tip |
|---|---|
| Color Temperature | Use the same white balance setting across related images |
| Tone Curve | Apply a consistent tone curve or adjust it slightly based on the image content |
| Color Saturation | Maintain a consistent level of saturation across images |
Ignoring the Original Image Lighting and Composition
While post-processing can significantly enhance an image, it’s essential not to overlook the importance of the original lighting and composition. A well-captured image with good lighting and composition will always be easier to edit into a great film look.
By being aware of these common mistakes and taking steps to avoid them, photographers can more effectively achieve a film aesthetic in Lightroom that enhances their images without compromising their natural beauty.
11. Building a Consistent Film Aesthetic Workflow
Achieving a consistent film aesthetic in your photography requires a systematic approach to editing. This involves creating a workflow that can be repeated across different projects and images, ensuring that your photographs maintain a cohesive look.
Creating a Repeatable Editing Process
To develop a consistent editing style, start by establishing a standard editing process. This begins with importing your images into Lightroom and applying initial adjustments such as exposure correction and white balance. Using a Lightroom film preset pack can streamline this process by applying a base film look to your images.
Next, fine-tune the colors and tones using the HSL panel and the Color Grading tools. It’s essential to save your frequently used settings as presets to maintain consistency across your edits.
Batch Processing with Film Presets
Batch processing is a time-saving technique that allows you to apply a set of edits to multiple images at once. By using film emulation presets, you can quickly give your photos a cinematic look. To batch process your images in Lightroom, select all the photos you want to edit, then apply your chosen preset.
After applying the preset, make any necessary adjustments to individual images to account for variations in lighting or composition.
Organizing Your Film Look Preset Library
As you accumulate more film emulation presets and create your own custom presets, it’s crucial to keep them organized. Create folders for different types of film looks, such as “Vintage,” “Cinematic,” and “Black and White.” This organization will help you quickly find the right preset for your project.
Maintaining Consistency Across Projects
To maintain a consistent aesthetic across different projects, it’s essential to use a limited palette of presets and editing styles. Consistency is key to establishing a recognizable style. Create a cheat sheet or guide that outlines your standard editing steps and the presets you use.
| Editing Step | Tool/Preset Used | Purpose |
|---|---|---|
| Initial Adjustment | Basic Panel | Exposure and White Balance Correction |
| Film Look Application | Lightroom Film Preset Pack | Apply Cinematic or Vintage Look |
| Color Grading | Color Grading Panel | Fine-tune Colors and Tones |
By following these steps and maintaining a consistent workflow, you can ensure that your photographs have a unified aesthetic that reflects your artistic vision.
12. Conclusion
Achieving a cinematic film look in Lightroom is now within your grasp. By understanding the key visual characteristics of cinematic images and utilizing the right tools in Lightroom, you can transform your photos into stunning works of art.
To recap, we’ve covered the essential steps to get a film look in Lightroom, from adjusting basic panel settings and creating the signature S-curve to fine-tuning clarity and texture. We’ve also explored advanced techniques such as color grading, adding film grain, and replicating classic film stocks.
For those looking to streamline their workflow, exploring film presets can be a game-changer. Resources like Lpresets.com offer a wide range of film presets that can help you achieve the desired aesthetic with ease. By incorporating these techniques and resources into your editing process, you’ll be well on your way to creating images with a timeless, cinematic quality.
Now that you’ve learned how to get film look in Lightroom, it’s time to put these skills into practice and elevate your photography to the next level.
FAQ
How can I effectively get a film look in Lightroom?
What defines the cinematic film aesthetic in digital photography?
Why should I use a lightroom film preset pack instead of manual editing?
How do I add realistic film grain in Lightroom?
Can I replicate specific film stocks like Kodak Portra or Fujifilm Pro 400H?
What is the “S-Curve” and why is it important for the film look?
How do I install and use lightroom film presets from Lpresets.com?
What are the most common mistakes to avoid when editing for a film aesthetic?
Related guides
- Moody Green Tone Lightroom Preset
- Lightroom Presets: A Comprehensive Guide
- 10 Free LUTs for Cinematic Videos

